In Python, Django is the most popular web framework. Second comes to Flask. What Flask is handy to do is to create some RESTful APIs by defining the web endpoints and the handlers. The frontend, however, is not something Django or Flask can provide to you. The best they can do is to ship a HTML and some JavaScript (also CSS) to the client side when a client loads the index page. Dash, however, is wrapping a default index page with some ReactJS stuff. So you can design your web in Python (i.e., server side code) and at the same time make some action handler. But this is all reactive, triggered from the client side. To make the server voluntarily push some data to the client, the standard way is to use WebSocket.
WebSocket is
not much different from a HTTP connection. It is a TCP socket with HTTP
handshake, and then upgraded to WebSocket. In the WebSocket stream, any kind
of data can be sent or received, including binary. The WebSocket URL starts
with ws:// rather than http://. The SSL/TLS version is wss://. On client
side, we should create a WebSocket JavaScript object to use it and hoot some
event handler to the socket. But WebSocket is a fairly new thing. Legacy
browsers would not know that.
Since WebSocket protocol is not too much difference to a BSD socket or HTTP connection, it is possible to write a WebSocket handler in Python. There are a number of packages in PyPI for this. But some are not updated for long.
The one that I tried, found it works, and can work together with Flask and Dash is the Flask-SocketIO. It is not a plain WebSocket library, but a socket.io library. It is a protocol on top of WebSocket and with a JavaScript library for client side. Using it seems can save a few lines of code.
The way this set up works is the following: By default Dash is to run on Flask server, so as the Flask-SocketIO, as both are like “add-ons”. We set up Dash with a Flask server created. Then pass on this Flask server to SocketIO. Then normal things can be created as usual with the decorators: Flask routes, Dash callbacks, as well as SocketIO message handlers.
To run the server, it is important to run the SocketIO object. Dash already modified the Flask app for that it needs. But SocketIO app is different and more complicated to set up, which we can’t get it run other way round. Otherwise this is the error you will see:
RuntimeError: You need to use the gevent-websocket server. See the Deployment section of the documentation for more information.
Here is an example on how these work together. First is the server side Python script:
import random
import time
import threading

from flask_socketio import SocketIO
from dash import Dash, html, dcc
from dash.dependencies import Input, Output, State

external_scripts = [
    {
        "src": "https://cdnjs.cloudflare.com/ajax/libs/socket.io/4.5.0/socket.io.js",
        "integrity": "sha512-/xb5+PNOA079FJkngKI2jvID5lyiqdHXaUUcfmzE0X0BdpkgzIWHC59LOG90a2jDcOyRsd1luOr24UCCAG8NNw==",
        "crossorigin": "anonymous",
    },
    "https://code.jquery.com/jquery-3.6.0.min.js",
    "https://cdn.plot.ly/plotly-latest.min.js"
]

# the "servers"
app = Dash("brownian", external_scripts=external_scripts)
socketio = SocketIO(app.server, logger=True, engineio_logger=True)

# web layout, using Dash
app.title = "Brownian motion"
app.layout = html.Div(
    id="root",
    children=[
        html.H1(
            children="Brownian motion",
            style={"textAlign": "center"}
        ),
        html.Div(
            className="flex-container",
            children=[
                html.Div(children=[
                    html.Div(id="showvariance"),
                    dcc.Slider(0, 2, 0.1, marks={0: "0", 0.5: "0.5", 1:"1", 1.5:"1.5", 2:"2"},
                               value=1, id="variance"),
                ]),
                html.Div(
                    className="flex-container",
                    children=[
                        html.Div(id="pong"),
                        html.Button(id="reset", n_clicks=0, children="Reset", style={"margin":"20px", "padding":"10px"}),
                        html.Button(id="pause", n_clicks=0, children="Pause", style={"margin":"20px", "padding":"10px"}),
                    ]
                ),
            ],
            style={"textAlign": "center"}
        ),
        dcc.Graph("motion"),
        html.Div(id="dummy", hidden=True),
    ]
)

variance = 1
n = 0
paused = False

# Action for slider to adjust variance
@app.callback(Output(component_id="showvariance", component_property="children"),
              Input("variance", "value"))
def update_variance(value):
    global variance
    variance = value
    return f"Variance: {value}"

# Action for the "reset" button, client side callbacks
app.clientside_callback(
    r"""function() {
        n=0; x=[]; y=[];
        var graph = document.getElementById("motion");
        Plotly.newPlot(graph, data=[{x:x, y:y}]);
    }""",
    Output("dummy", "children"),
    Input("reset", "n_clicks")
)

# Action for the "pause" button, client side callbacks
@app.callback(Output("pause", "children"),
              Input("pause", "n_clicks"))
def toggle_pause(n_clicks):
    global paused
    paused = not paused
    return "Resume" if paused else "Pause"

# websocket event handler
@socketio.on("ping")
def pong(n):
    socketio.emit("pong", data=n)

# threading function, for websocket emit to all
def rng():
    while True:
        # Generate a random number once every 0.5 seconds
        time.sleep(0.5)
        if not paused:
            socketio.emit("update", data=random.normalvariate(0,variance))

th = threading.Thread(target=rng, daemon=True)
th.start() # no th.join() as it it is a daemon thread that runs indefinitely

socketio.run(app.server, port=8050, debug=True)
# Won't work: app.run_server(debug=True)
This script deliberately demonstrate different styles of using Dash. We can
provide the external scripts as URL string or as dict. We need to launch two
servers, as variable app (Dash) and socketio (Flask-SocketIO), both hooked
to the same Flask instance, app.server. Then we set up our page layout using
Dash widgets. An annoying fact of Dash is that all callback must go with an
output. Therefore we made a hidden “dummy” div element at the end (or we can
set style with {"display":"none"}).
Some callbacks are easy: The slider just updates a global variable for the amount of variance. The reset button is to run some JavaScript on client side. The pause button toggles a boolean variable, which also updates the text on the button between “Resume” and “Pause”. These are just standard Dash things.
The key function is on the WebSocket side. This is a short piece of code we put
into assets/main.js so Dash will send to the client when the page is loaded:
var socket = io();
var x = [];
var y = [];
var n = 0;

var timer = setInterval(ping, 1000);
function ping() {
    socket.emit("ping", n++);
}
socket.on("pong", function(v) {
	$("#pong").html(v.toString());
})

socket.on("update", function(z) {
	x.push(n++);
	if (y.length) {
		y.push(y.at(-1) + z);
		// before ES-2022: y.push(y[y.length-1] + z);
	} else {
		y.push(z)
	};
	var graph = document.getElementById("motion");
	Plotly.newPlot(graph, data=[{x: x, y: y}]);
})
We set up two JavaScript arrays, x and y and push values into them on the
socket’s “update” event (this name is arbitrary). Then we refresh the graph
with the updated data. This “update” event is server side push. In the Python
code, we use the rng() function that runs as a daemon thread to emit the data
(a floating point) to the client side once every 0.5 seconds.
At the same time, we set up a ping() function that runs once a second on
JavaScript side that sends an integer n using socket.io’s “ping” event to the
server side. The Python code’s pong() function is set up as handler on this
event and echo back the integer on a “pong” event. The JavaScript side will
handle the “pong” event by updating a div element with the number it received.
This is a client side driven WebSocket communication. But the receive end on
client side is also set up as event handlers.
The Python script side must use socketio.run() instead of Dash
app.run_server() to properly set up the asynchronous framework for WebSocket.
For completeness, this is what I put into assets/main.css to properly format the layout:
.flex-container {
    display: flex;
    padding: 5px;
    flex-wrap: nowrap;
}

.flex-container > * {
    flex-grow: 1
}
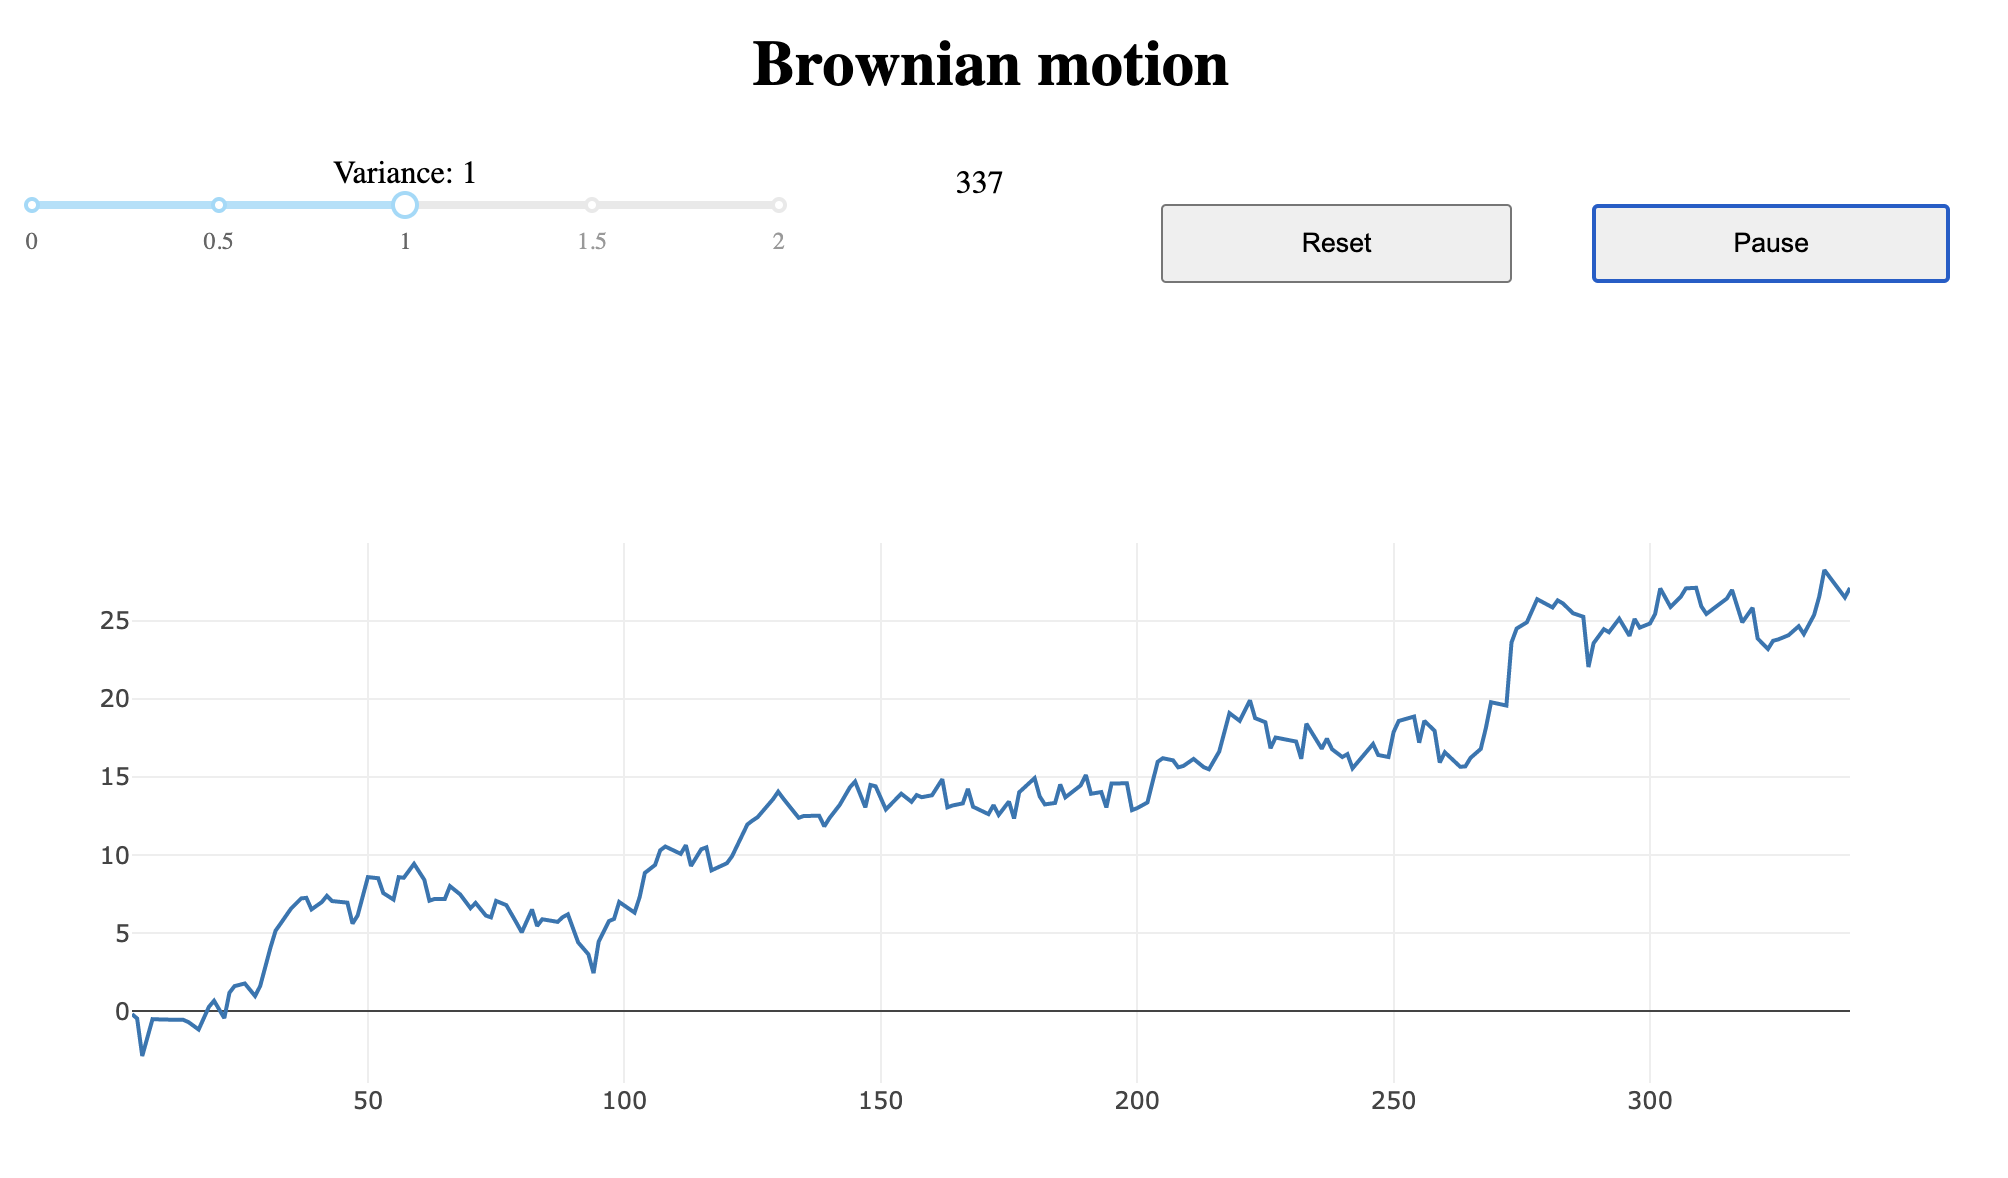
and the screen looks like this: